# IntelliJ IDE
# Prerequisities
- git, Maven, IntelliJ and Java 11 are installed
# Install OpenHAB distribution
- Install the official openHAB distribution
- Start the distribution in debug mode (use
./start_debug.shinstead of./start.shin step 4)
This article refers to the directory where you installed the distribution as <DISTRO_DIR>.
# Build the addons repostory
fork and clone the openhab addons repository into a new directory (Reference
<ADDON_DIR>from now on for this arcticle) withgit clone https://github.com/<yourgitusername>/openhab-addons(replace git user name accordingly)open IntelliJ and create a new Project from existing sources (File | New | Project from existing sources) and pick
<ADDON_DIR>/pom.xmlIntelliJ will start importing, indexing and building, it will take while, wait until finished (see status bar)
Use Maven to clean & install the addons project
- mvn clean install in the root of
<ADDON_DIR>using commandline Maven (or IntelliJ Maven view) - some of the addons might fail to build - if it's not the one, you're interested in that should not bother you
- when the Maven project finished, you should find the freshly built addon JAR in the target directory
- mvn clean install in the root of
# Debug your addon
copy the addon JAR to Openhab distribution created before
cp target/<ADDON_NAME>.jar <DISTRO_DIR>/addons
The running instance of the openhab distribution should pick up your new addon & start it
- you can type
log:tailin the openhab console to stream the openhab logs
- you can type
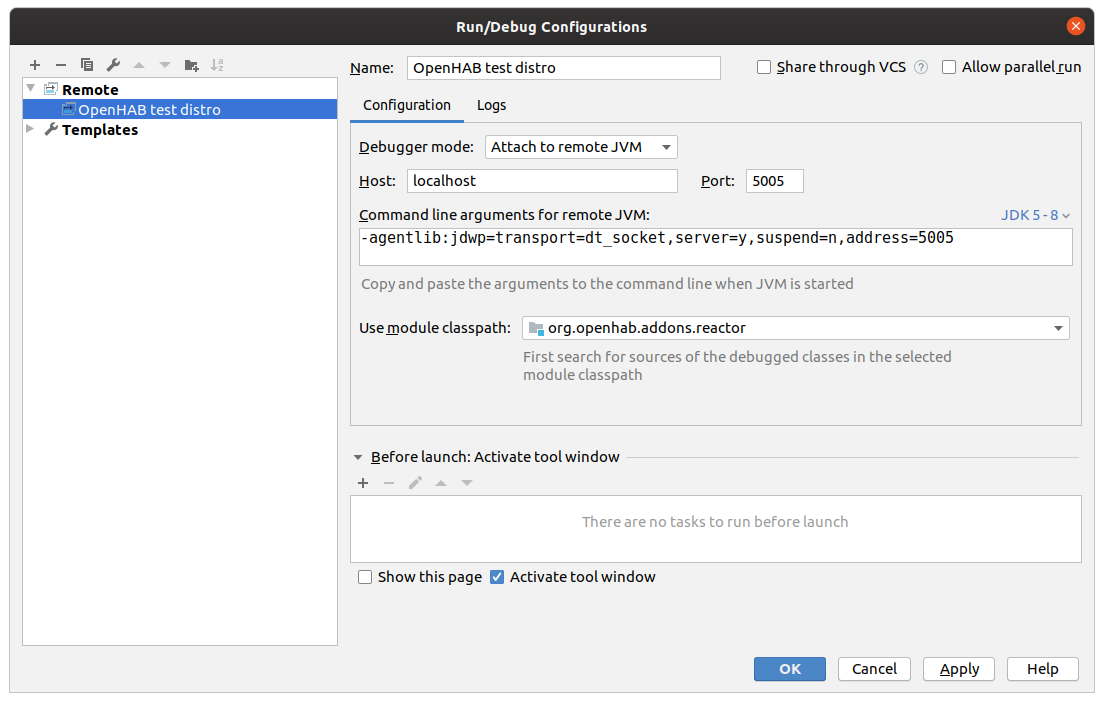
create a Remote Debug runtime configuration in IntelliJ:
- Open menu Run | Edit configurations
- click the + sign to add a "Remote" configuration
- adapt the module setting to the root (org.openhab.addons.reactor)
- click OK
- start the debug configuration
- the IntelliJ console should log:
Connected to the target VM, address: 'localhost:5005', transport: 'socket'

You can now add breakpoints to your project now and your test distro should stop there.
