Contents
# Raspberry Pi
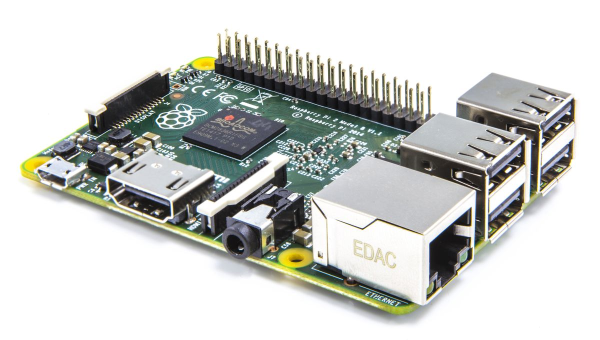
Because of its low price, its small form factor and the low energy consumption, the Raspberry Pi is a quite popular platform for openHAB. It is favored amongst existing users and a recommended choice for newcomers.
If you want to learn more about the possibilities of the Raspberry Pi and Linux in general, many tutorials can be found on the internet. These including the official raspberrypi.org help articles or the in-detail articles at eLinux.org.
Recommendations for a "headless" hardware setup:
- Raspberry Pi 2 or better, compare the available devices here if you are unsure.
- SD card (16GB or more to support wear-leveling)
- Steady power supply
- Ethernet connection
- No connected display or keyboard needed
# Recommended Setup
We are proud to provide a preconfigured image for the Raspberry Pi, with the latest build of openHAB and many useful software components (like Samba, Grafana or Mosquitto) as optional setup steps. The image provided by the openHABian projects is based on Raspbian and under constant improvement.
Check out more details about openHABian, the hassle-free openHAB setup.
# Manual Setup
If you want or need to set up openHAB on a Raspberry Pi by yourself, please follow these recommendations. For the beginning, we recommend to download and install the latest Raspbian SD card image. You may choose the "Lite" version.
Attention: As of the November 2016 release, Raspbian has the SSH server disabled by default. You will have to enable it manually. For headless setup, SSH can be enabled by placing a file named "ssh", without any extension, onto the boot partition of the SD card.
# Connecting
Get your SD card and network cable plugged in and power up. Booting up takes up to 10 minutes. To connect with an SSH client (like Putty), you need to know the IP address or hostname of your device. A standard Raspbian setup should be reachable either by the hostname "raspberrypi" or though the local domain name "raspberrypi.local". If you are not able to connect, check your routers web frontend for newly connected devices.
# First Steps
Connected via SSH, execute the Raspbian configuration menu by running sudo raspi-config.
Go through the following steps:
- Expand the file system
- Change your password
- (Change the host name if you wish, e.g. "openhabpi")
- From the advanced menu, change the memory split for the GPU to "16"
- Restart
As a good practice, run a full upgrade and install packages you like or need (a set of helpful packages is given as an example):
sudo apt-get update
sudo apt-get upgrade

sudo apt-get install screen mc vim git htop
Note on Java: Raspbian in the latest full version already includes Oracle Java 11. However, at the time of this writing, the installed revision is lower than the recommended. Raspbian Lite comes without Java to begin with.
# Manual setup of Zulu 11
The following steps refer specifically to Raspberry Pi devices. For a more general overview. please refer to the Linux article for instructions on how to install the latest Java 11 revision.
create a folder for Zulu 11 and make it the current folder. For instance,
/opt/jdk. You can use the commandssudo mkdir /opt/jdk cd /opt/jdkverify the architecture of your device. You perform this issuing the command:
dpkg --print-architecturethis will show whether you need files for Soft Float (
armsf) or Hard Float (armhf) . Raspberry Pi 4 runs on ARM32-bit HF architecture (armhf), for instance.
Now, to install Zulu 11, you need to download and install a tar.gz package for your architecture following the steps described below (armhf architecture assumed for reference):
Download the latest Zulu 11 build from the Azul download page - at the time of writing, it's
zulu11.43.100-ca-jdk11.0.9.1-linux_aarch32hf. You can use the command:sudo wget http://cdn.azul.com/zulu-embedded/bin/zulu11.43.100-ca-jdk11.0.9.1-linux_aarch32hf.tar.gzExtract the archive
sudo tar -xzvf zulu11.43.100-ca-jdk11.0.9.1-linux_aarch32hf.tar.gzInstall
javaandjavacsudo update-alternatives --install /usr/bin/java java /opt/jdk/zulu11.43.100-ca-jdk11.0.9.1-linux_aarch32hf/bin/java 1 sudo update-alternatives --install /usr/bin/javac javac /opt/jdk/zulu11.43.100-ca-jdk11.0.9.1-linux_aarch32hf/bin/javac 1change the current alternative:
sudo update-alternatives --config javaYou'll be prompted to select the alternative, pick the zulu11 you installed.
If you wish so, you can now delete the downloaded tar file
sudo rm *.tar.gz
# Installation of openHAB
This section describes the steps required to install openHAB on the Raspberry device, after you completed the above mentioned prerequisites steps.
It is a selection of the general Linux installation steps described in Package Repository based Installation on Linux .
Refer to that page if you wish to view a comprehensive guide to every possible Linux installation environments instead.
First, add the openHAB Bintray repository key to your package manager and allow Apt to use the HTTPS Protocol:
wget -qO - 'https://bintray.com/user/downloadSubjectPublicKey?username=openhab' | sudo apt-key add -
sudo apt-get install apt-transport-https
choose the openHAB package to install.
You can choose between Official (Stable), Beta or Snapshot builds.
If you are new to openHAB and don't know what to pick, you likely need the Stable version. Expand the section of your choice for the details of the installation step.
Official (Stable)
The stable builds contain the latest official release with tested features.
Add the openHAB Stable Repository to your systems apt sources list:
echo 'deb https://dl.bintray.com/openhab/apt-repo2 stable main' | sudo tee /etc/apt/sources.list.d/openhab.listTesting Release
The beta and release candidate builds come out less frequently, but will contain new features that are currently in the testing phase.
Add the openHAB Beta Repository to your systems apt sources list:
echo 'deb https://openhab.jfrog.io/artifactory/openhab-linuxpkg testing main' | sudo tee /etc/apt/sources.list.d/openhab.listSnapshot Release
The snapshot build is created almost daily, and include the latest changes to the openHAB core and add-ons. These changes are often unstable, so you should use this branch only for testing or development purposes.
The snapshot repository is hosted in openHAB's JFrog Artifactory instance. To use it, add the openHAB Unstable Repository to your systems apt sources list:
echo 'deb https://openhab.jfrog.io/artifactory/openhab-linuxpkg unstable main' | sudo tee /etc/apt/sources.list.d/openhab.list
re-synchronize the package index:
sudo apt-get updateInstall openHAB with the following command:
sudo apt-get install openhab(optional) When you choose to install an add-on, openHAB will download it from the internet on request.
If you plan on working off-line, you might consider installing the add-ons package.
sudo apt-get install openhab-addons
If everything went well, the installation is complete.
You can now start openHAB and test it as described in the following points
- Start openHAB
sudo systemctl start openhab.service
sudo systemctl status openhab.service
test that openHAB is running fine.
You can try to reach the openHAB dashboard, using the link:
http://openhab-device:8080(replace localhost or your device IP address to openhab-device). You should get the create new admin screen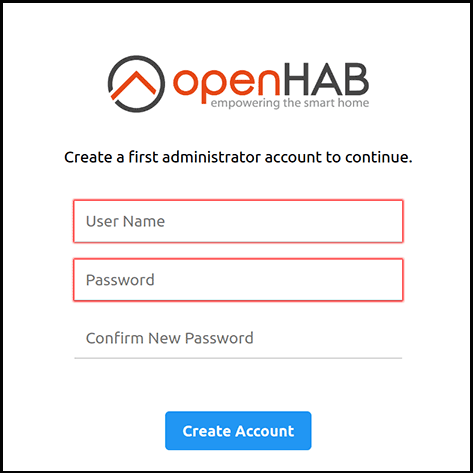
Install openHAB as a service. This will allow openHAB to run without need for a manual start as described above.
sudo systemctl daemon-reload
sudo systemctl enable openhab.service
You are all set.
# What next ?
You can:
- continue reading the Additional steps section of the Installation overview
- read more about how to handle basic maintenance tasks, in the section below
# Maintenance
# File Locations
This is the location of folders of interest for the user:
| Repository Installation | |
|---|---|
| openHAB application | /usr/share/openhab |
| Additional add-on files | /usr/share/openhab/addons |
| Site configuration | /etc/openhab |
| Log files | /var/log/openhab |
| Userdata like rrd4j databases | /var/lib/openhab |
| Backups folder | /var/lib/openhab/backups |
| Service configuration | /etc/default/openhab |
# Utilities
# Service Control
openHAB will run as a service in the background. The most important commands to control the openHAB service are given below.
# Learn about the current service status
sudo systemctl status openhab.service

# (Re-)Start openHAB (background service)
sudo systemctl restart openhab.service

# Stop the openHAB background service
sudo systemctl stop openhab.service

# Get the service log since the last boot
sudo journalctl -u openhab.service -b

# Make openHAB automatically start after booting the Linux host
sudo systemctl daemon-reload
sudo systemctl enable openhab.service
# Command Line Interface
After installing openHAB, a shortcut named openhab-cli provides access to the openHAB-specific commands (such as backup, restore, and console).
To use the shortcuts in a terminal, simply type openhab-cli followed by the command.
For example:
Usage:  openhab-cli command [options]

Possible commands:
  start [--debug]     -- Starts openHAB in the terminal.
  stop                -- Stops any running instance of openHAB.
  status              -- Checks to see if openHAB is running.
  console             -- Opens the openHAB console.
  backup [filename]   -- Stores the current configuration of openHAB.
  restore filename    -- Restores the openHAB configuration from a backup.
  showlogs            -- Displays the log messages of openHAB.
  info                -- Displays distribution information.
# Viewing Log Messages
You can learn more about openHAB and how it works by looking at your log files. These will tell you everything you might need to know.
To access the current log of openHAB, execute the following command in one session or have both files separated in sessions side by side:
tail -f /var/log/openhab/openhab.log -f /var/log/openhab/events.log
if you wish to filter the results, please notice that there is an utility to support you, named grep. A quick example below:
tail -f /var/log/openhab/openhab.log -f /var/log/openhab/events.log | grep "theStringYourLookingForGoesHere"Refer to its help for details.
if you wish to modify the level of detail of logging, you'll need to interact with the openHAB console, as described int the Administration-Logging page.
# Backup and Restore
It is recommended to make a backup of your configuration before any major change.
To make a backup of openHAB2, you need to retain your configuration and userdata files.
openHAB comes with scripts for storing your configuration in a zip file which is saved in /var/lib/openhab/backups for automatic installs
You can change the default path by setting the $OPENHAB_BACKUPS environment variable.
sudo $OPENHAB_RUNTIME/bin/backup
## OR ##
sudo $OPENHAB_RUNTIME/bin/backup /path/to/backups/folder/myBackup.zip
To restore from these generated files:
sudo $OPENHAB_RUNTIME/bin/restore $OPENHAB_BACKUPS/myBackup.zip
If you're unsure how to use the above files, just use --help or -h:
$OPENHAB_RUNTIME/bin/backup --help
# Upgrade
To stay up to date with new releases, you should do regular upgrades. This is especially important if you are working with the latest snapshot as changes and fixes are incorporated constantly.
Your personal configuration will be retained on upgrades. We still recommend a backup before each upgrade.
You can upgrade issuing the following commands:
sudo apt-get update
sudo apt-get upgrade
# Change of Version
You may want to switch to a different repo, or an older (but more stable) version of openHAB.
To do this, select the repo as described in the installation instructions above, then find the version by bringing a list of all versions available to install:
sudo apt-get update
apt-cache showpkg openhab
Once you know which version you want, you can upgrade/downgrade to it by using the apt-get install openhab=[version] command, for example:
sudo apt-get install openhab=3.0.0-1
# Uninstallation
To uninstall openHAB and get rid of all related files managed by the package manager, make a backup as described above, then uninstall openHAB and remove the repository:
sudo apt-get purge openhab*
sudo rm /etc/apt/sources.list.d/openhab.list
# Additional Setup steps
Please refer to the Recommended Additional Setup Steps in the Linux installation guide.